My best girl friend was diagnosed with pre-diabetes 😥
This is a serious condition that we have to be careful with. The nutritionist advised her not to eat carbs and high GI foods. She can not even have fruits, not to mention conventional desserts. We both love cakes and desserts and this is a horrible news to us. But as a cake lover, how can we give up eating cakes?
Then I did a lot of research and tried many cakes recipes, I found it is really tough to make Asian style fluffy cakes keto style. Not to mention the dessert has to meet my pickiness and what my friends’ called “unrealistic expectations”.
This one is the only one I tried and loved so far. Well, I meant, the only good one so far that satisfied my picky taste buds. For sure I am still trying hard to discover more and see if I can find more good recipes.
This original cake recipe comes from the confusing YouTube video: Low Carb Keytone Cake chocolate ciffice rolls by Daddy’s Dessert. However, I was confused on the ingredients and process in this video. Thus, I made some changes according to my experience of making it. Besides, I add cacao nibs in the cream since I love this bitter super food! I appreciate Daddy’s Dessert posted this video.
Ingredience:
Cream
- 2 sets of heavy whipping cream: 100g each (200g total)
- Erythritol or monk fruit sugar: 30g
- Coffee powder: 5g
- Cacao nibs: 1table spoon
Cake body
- Unsalted butter: 90g
- Almond flour: 150g
- Aluminum free baking powder: 15g
- Erythritol or monk fruit sugar: 30g
- Cacao powder: 20g
- Heavy whipping cream: 200g
- Egg white: 200g
- Yolk: 90g
- Erythritol (to be blend in egg white): 50g
Direction:
Step 1: The coffee cream
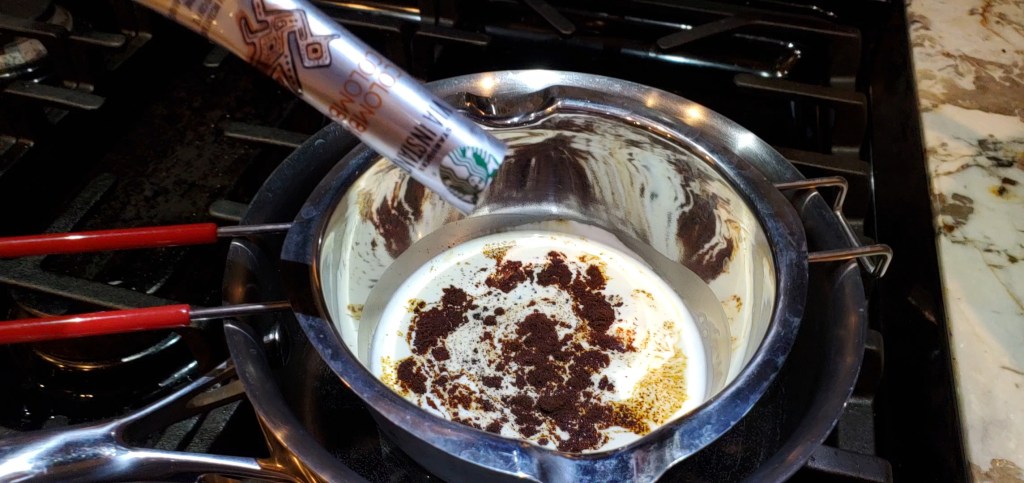
Pour the first set of 100g heavy cream into a glass jar. Then set the glass jar in a saucepan filled with an inch of water. Put it on stove and slowly heat it up with low heat.
Add the 5g coffee powder into the cream, and stir until it melts and blend well.
Put this mixture into the fridge for now. We will mix it with the other set of 100g heavy whipping cream later when it cools down.
Step 2: Make the cake base
Melt the unsalted butter in the microwave and put aside.
Mix almond flour, baking powder, cacao powder and erythritol ( or monk fruit sugar) well.
Add heavy whipping cream and the melted unsalted butter. Stir the mixture well till there is no lump.
Add the egg yolk and mix well. Then put the mixture on the side.
Step 3: Make egg white foam to fluff up the cake
Similar to most fluffy Asian style cakes, this is the most critical step which determines if the cake can be spongy and fluffy. Please ensure the container and the mixer are clean without any oil residue before you continue. Any trace of oil will deflate the egg white and it will never foam up no matter how long you whisk it. Again, I learned it in a hard way years ago, and I don’t want you to experience the frustration I had.
Also please ensure you have a electronic mixer for this process. Trust me, your wrist will thank you for not using your “hand mixer” 😀
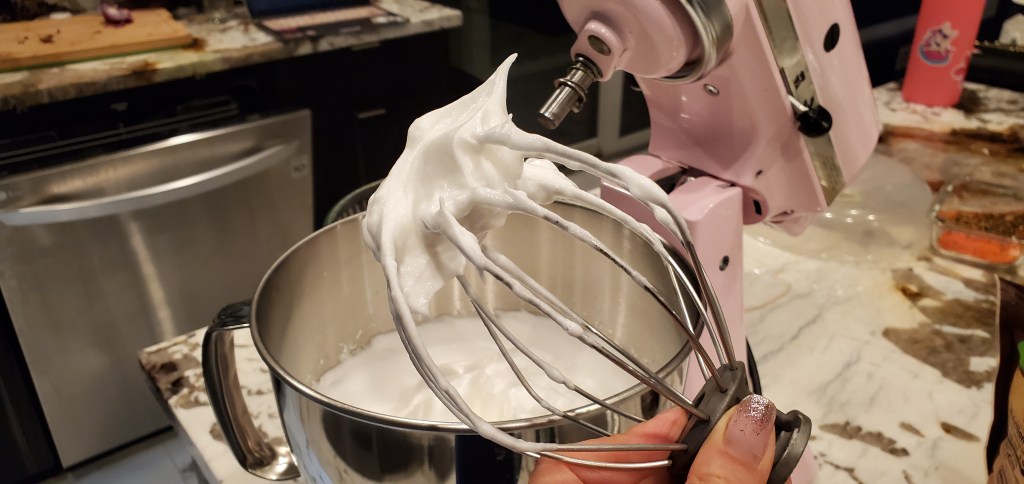
Pour egg white into the extremely clean container, then use medium speed setting of the electronic mixer to whisk it till white foamy bubbles show up.
Stop the mixer, and add half of the 50g erythritol (or monk fruit sugar) into it. Then turn on the mixer to ensure they are mixed well. Then add the second half part of the erythritol into it.
Turn the mixer setting to high and whisk about 30 seconds. Then turn the mixer setting to medium, and whisk it till the egg white rose up and is firm. That is, when you pull the mixer up, you will see the egg white form a beautiful firm pointy tip on the end of your mixer handle. The pointy tip does not drop down and it looks pretty solid.
Step 4: Preheat the oven to 400 degree Fahrenheit
Preheat the oven to 400 degree Fahrenheit. The oven will be ready when we finish making the batter 😀
Step 5: Mix the cake base with the egg white foam
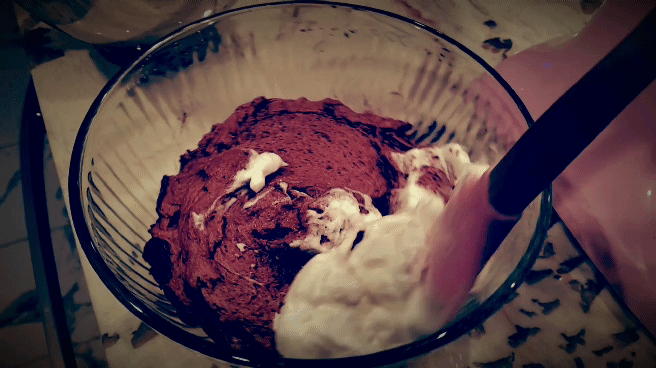
Please pour half of the foamy egg white into the cake base. Use a spatula and slowly mix them well. Then add another half egg white foam into the batter, and using your spatula and gentally mix them well. We have to be very careful not to deflate the egg white foam but ensure these two batters are mixed evenly. I don’t recommend a whisk for this process since it will deflate egg white foams.
Step 6: Send the batter to the preheated oven
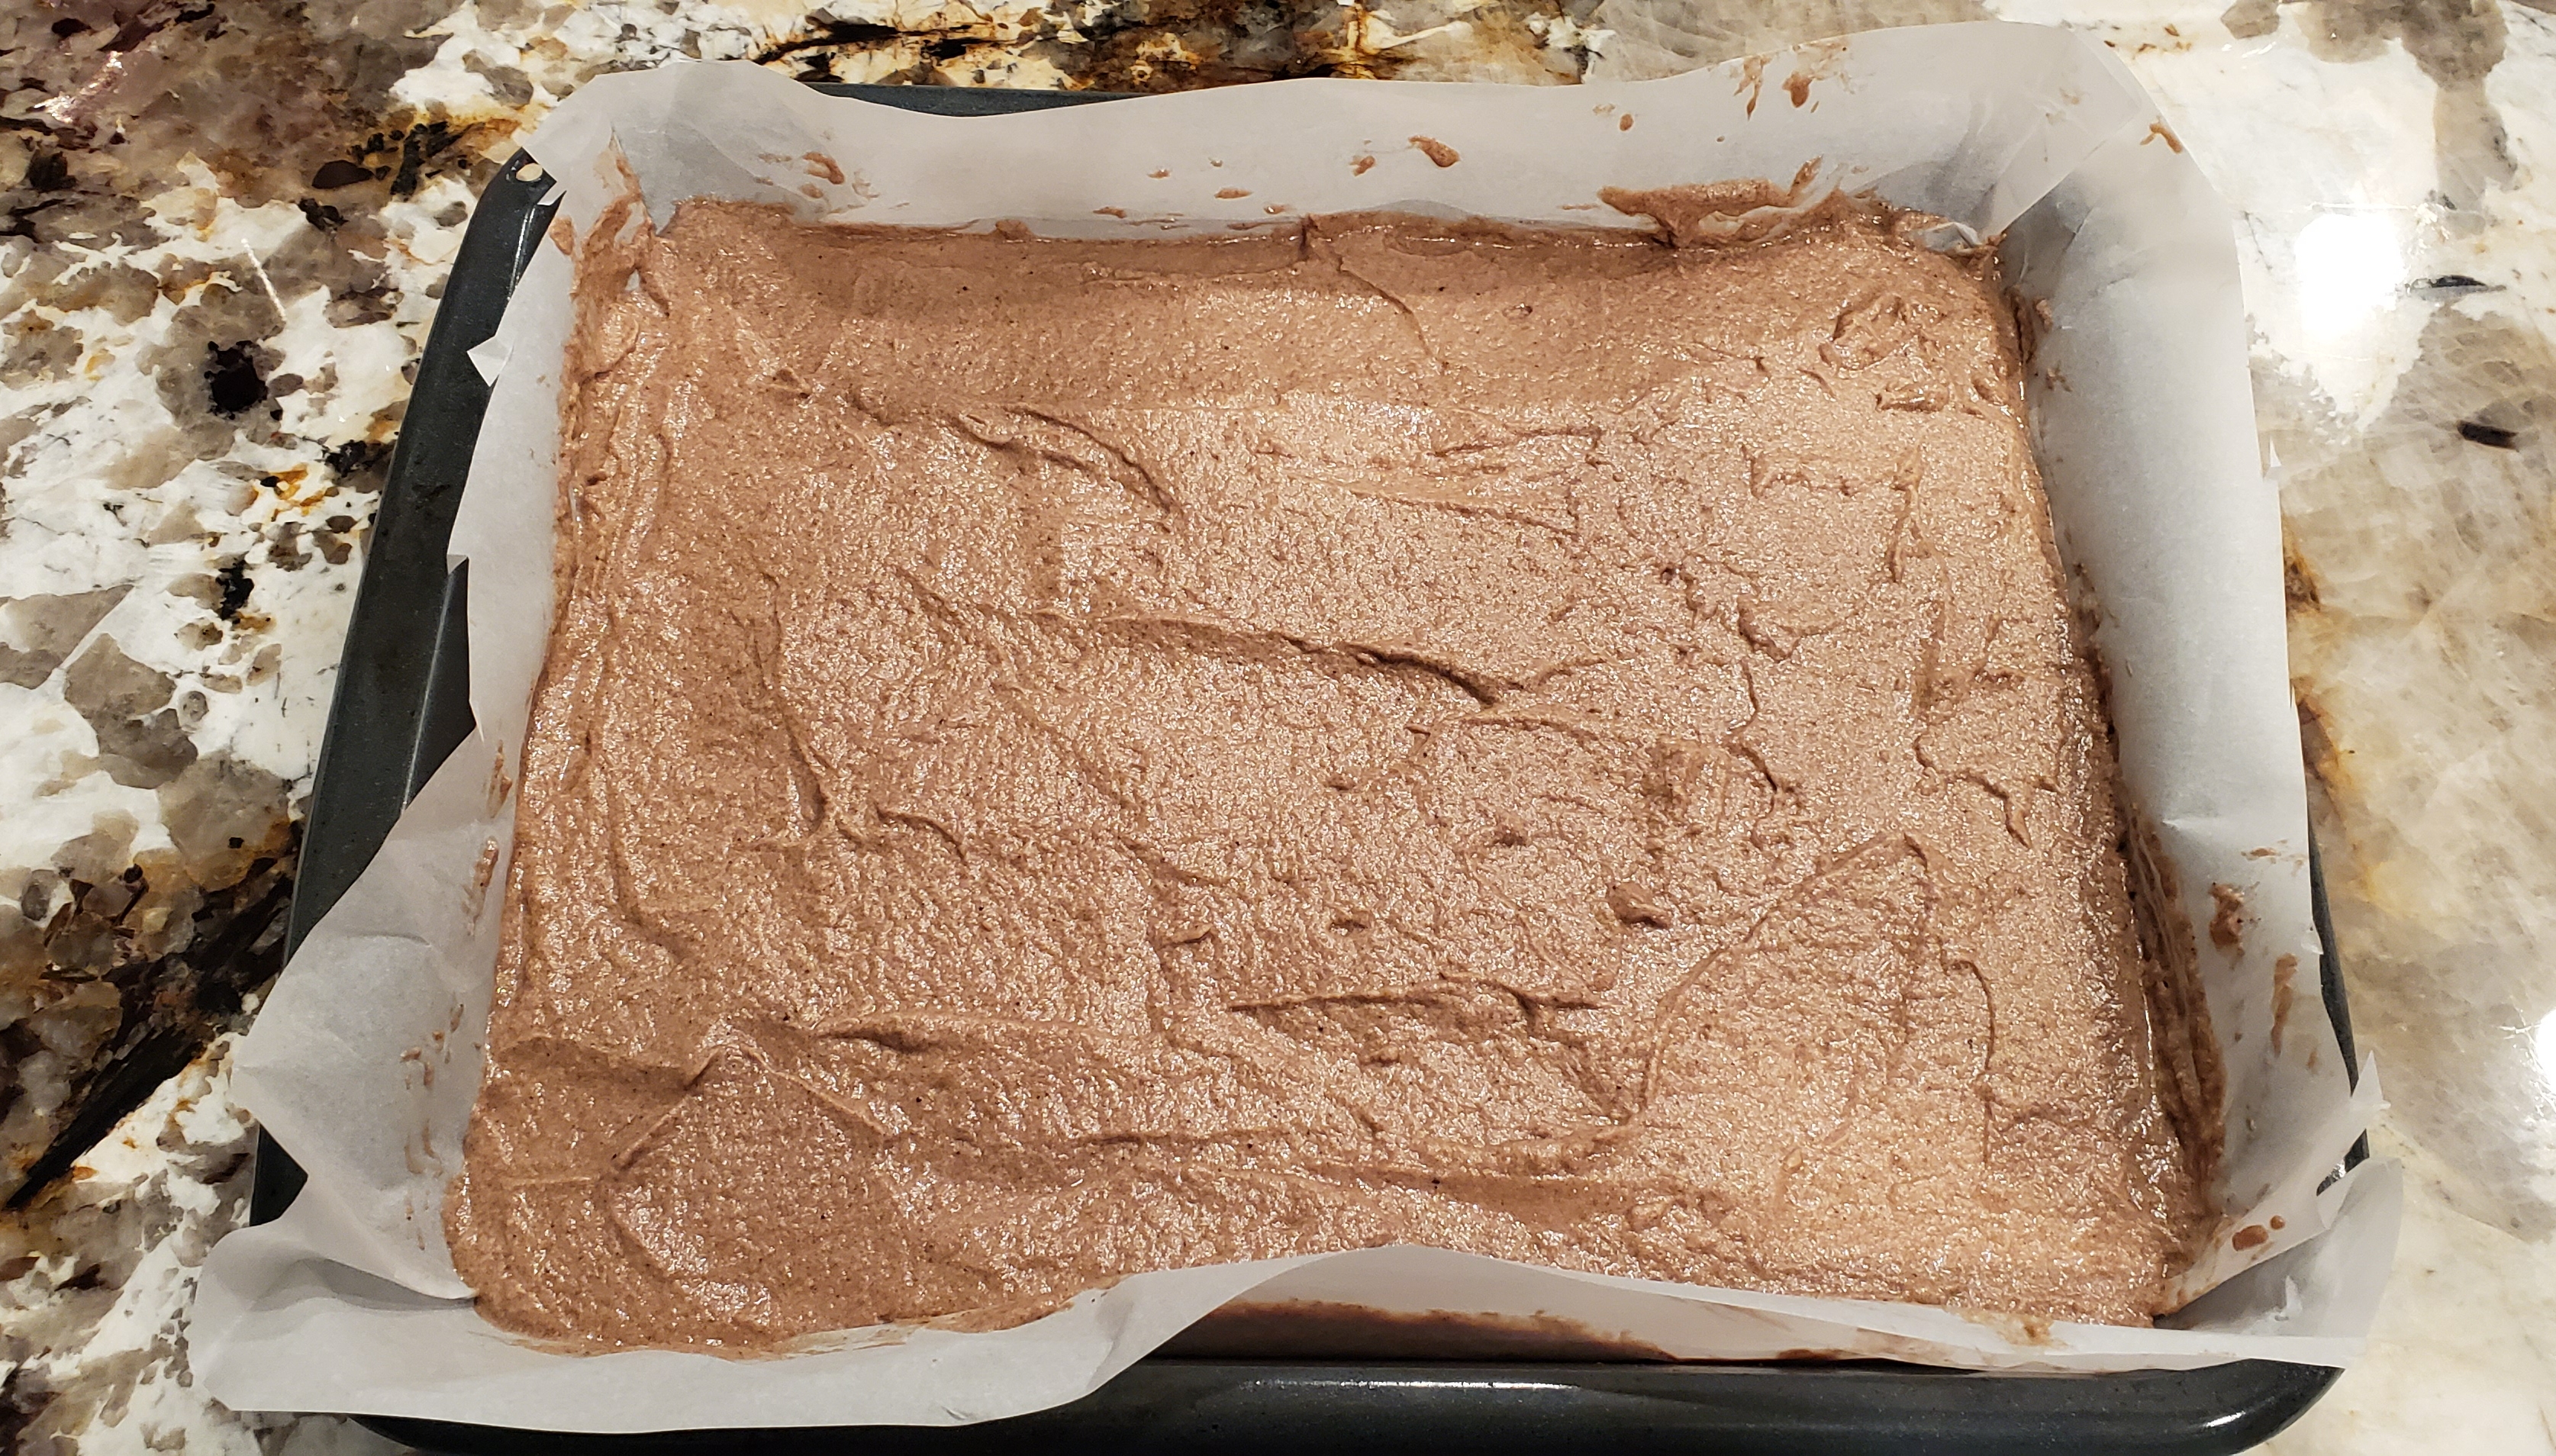
If you are not using a non-stick pan and too lazy to spray oil on the pan, then place parchment paper on a rectangular baking pan like me. Please ensure the parchment paper also covers the side of the pan not just the bottom of the pan.
If you are pretty sure your baking pan does not stick, then ignore the previous paragraph.
For the size of the baking pan, I would recommend the size of 9″ x 13″.
If you want to use a bigger baking pan, which is fine too. The problem is that you may need more cream filling since your cake would be thiner skin but larger, and the cake will have more rings which requires more cream to fill it up (Well, it is probably not a bad idea since the creamier the merrier!) 😀 One potential danger for thiner larger roll cake is that, it may not stand up pretty and crack on sides since it is thin and hard to hold itself. Hey, but they are very yummy too!
Transfer your batter to the baking pan, and use spatula to even up the surface.
“Bang” the bottom of the baking pan on the counter top several times to release bubbles inside the batter. Well, that is what my husband said. He thought I banged and cracked the counter (I have to roll my eyes for this ridiculous statement).
Then you can transfer the batter to the oven! Set the timer for 15 minutes 😀
When the time is up, I usually poke a chopstick into the cake, then pull it out and see if there is any batter comes out with the chopstick. If there is nothing sticking on the chopstick, it means the cake is done! Yay!

If there is some batter on the chopstick, you can prolong the baking time and check again 2 minutes later.
After it is done, I would leave the cake out for at least 30 minutes to ensure it is completely cool.
Step 7: Prepare the cream fillings
Take out the coffee cream from the fridge (it should be chill now), and pour it into the mixer bowel.
Add the other set of the 100g heavy whipping cream, add erythritol (30g), then turn on your mixer in high speed. Whisk until the cream rise and become the real puffy cream (yummy!) 🤤
Then mix cacao nibs in. I love cacao nibs, but if you dislike those bitter nibs, you can choose to replace them with nuts. It’s your cake, it’s up to you 😀
Step 8: Roll it up!
When the cake is cool and the cream is ready, let’s roll it up!
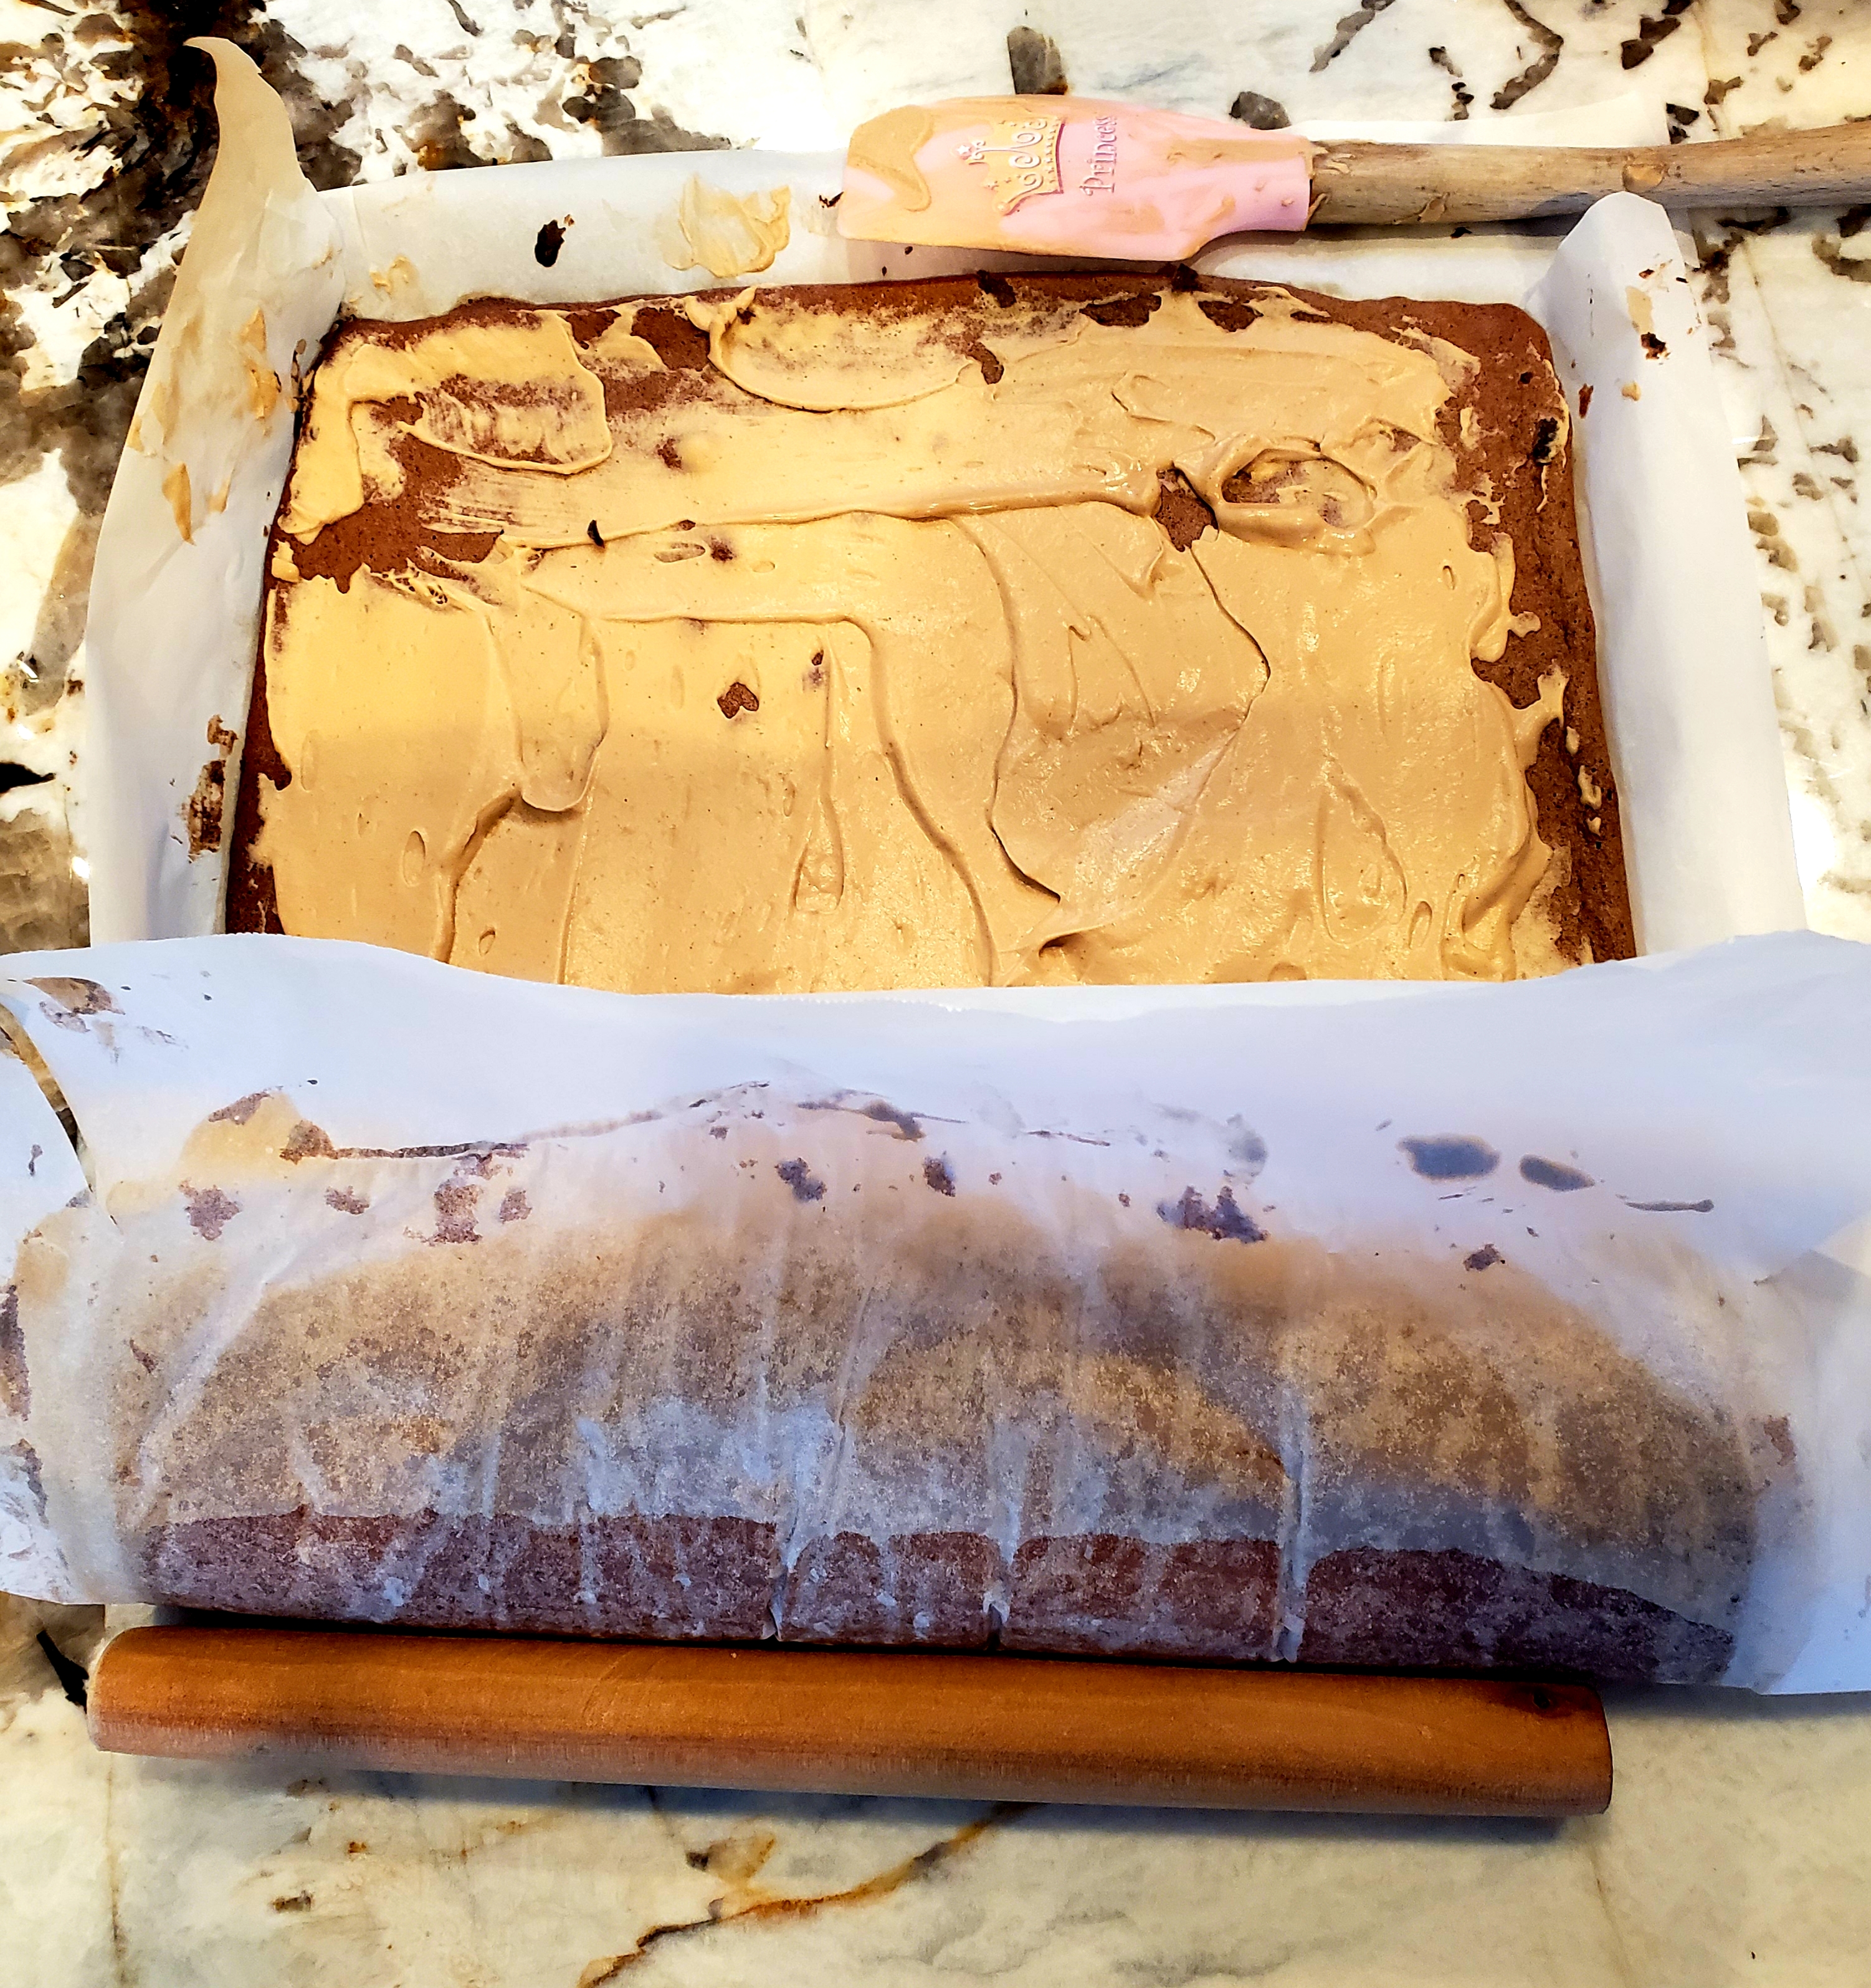
Take out a big board (ensure it is bigger than the baking pan) and lay a piece of parchment paper on the board. Put the board on the top of the baking pan, ensure the parchment paper side face the cake. Flip both the board and the baking pan and let the cake fall on the new parchment paper and the board. Put the board down on the counter. Then gently slide out the board and let the cake lay on the new parchment paper on the counter. Now you can peel out the old parchment paper on the top. Voila! The beautiful square sponge fluffy cake is right in front of you!

Use spatula to evenly spread the yummy coffee cream on the top surface of the cake.
Then take a rolling pin and put behind the parchment paper. Push the rolling pin against the parchment paper and roll the cake up gently. It takes patient since we should always check to ensure both sides are rolling up evenly.
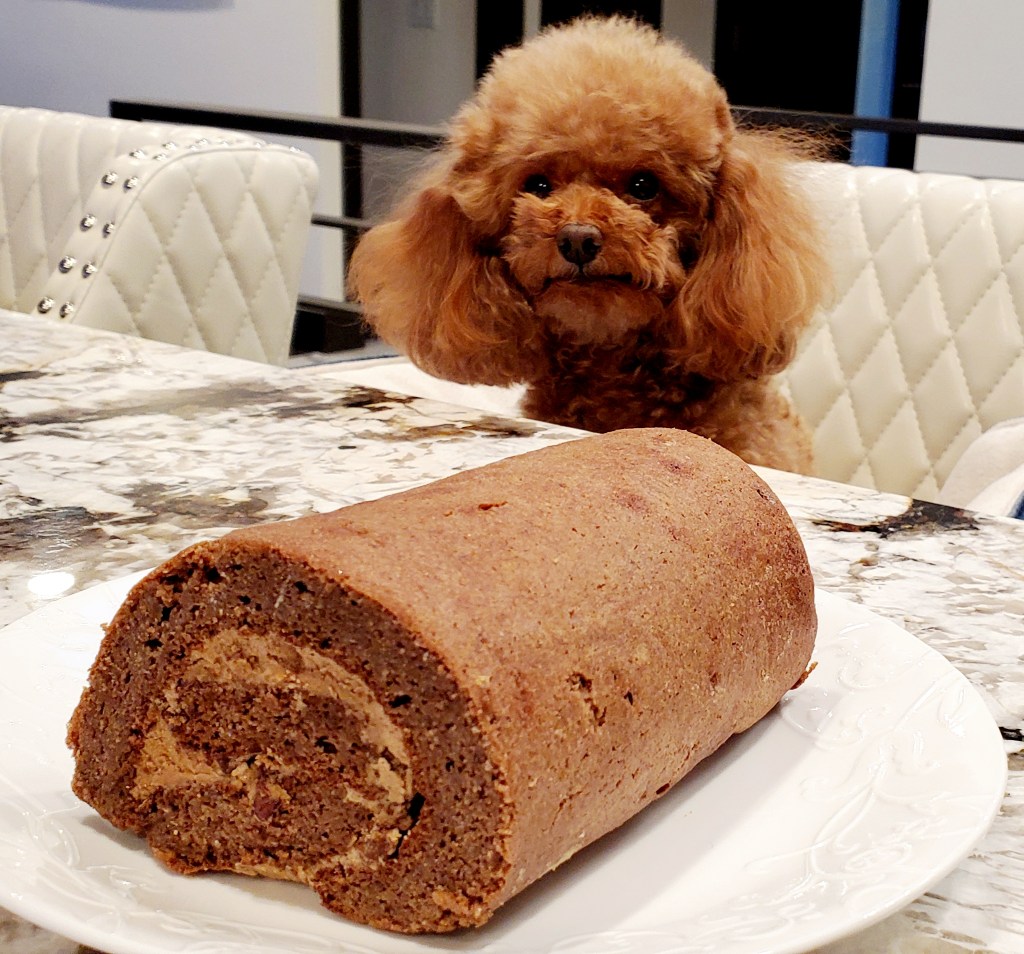
Step 9: Cut and enjoy!
This is the most important final step! You can trim off sides so the cake would look very professionally made 😀
Then cut it into pieces and enjoy with your lovely family and friends!
I hope you enjoy this cake as much as I do!

Leave a comment